
n8n
Use n8n to build automated workflows that trigger CoreClaw Workers, poll run status, and route results to any service — no code required.
How it works
Section titled “How it works”The CoreClaw n8n integration provides a dedicated community node (n8n-nodes-coreclaw, v0.4.1+) that maps the CoreClaw API v2 onto six resources with 37 operations in total:
- Store Worker — Search the public marketplace
- Worker — List, get details, get input schema, run, and run-and-get-results, plus last-run lookup (abort / export / log / rerun / list results)
- Worker Run — List and look up runs by ID or “last”; abort, log, rerun (and rerun-and-get-results), list results, and export
- Worker Task — Full CRUD on saved task templates (list / create / get / update / delete / get input / update input), run, and run-and-get-results
- Proxy — List proxy regions
- Account — Get account info (balance, traffic, plan)
Three operations are composite — Run and Get Results, Rerun and Get Results, and the task variant of Run and Get Results. A composite op starts the run, polls until it reaches a terminal state (up to ~4 minutes), then fetches the results in a single node — no Wait/poll loop to build by hand. On a failed or cancelled run, the node’s error includes the run log.
For webhook-driven flows (no polling), pair a run’s Callback URL field with the separate CoreClaw Trigger node, which receives callback_url POSTs locally. You can also use the HTTP Request node to call the CoreClaw REST API directly for advanced cases.
Prerequisites
Section titled “Prerequisites”- A CoreClaw account
- An API key from Settings → API & Integrations in the CoreClaw Console
- An n8n instance (cloud or self-hosted)
n8n Cloud setup
Section titled “n8n Cloud setup”Install the CoreClaw node
Section titled “Install the CoreClaw node”For n8n Cloud users, installation is straightforward — search and add the node directly from the canvas.
- In n8n Cloud, create a new workflow or open an existing one.
- Open the nodes panel (click the + button on the canvas).
- Search for CoreClaw in the community node registry.
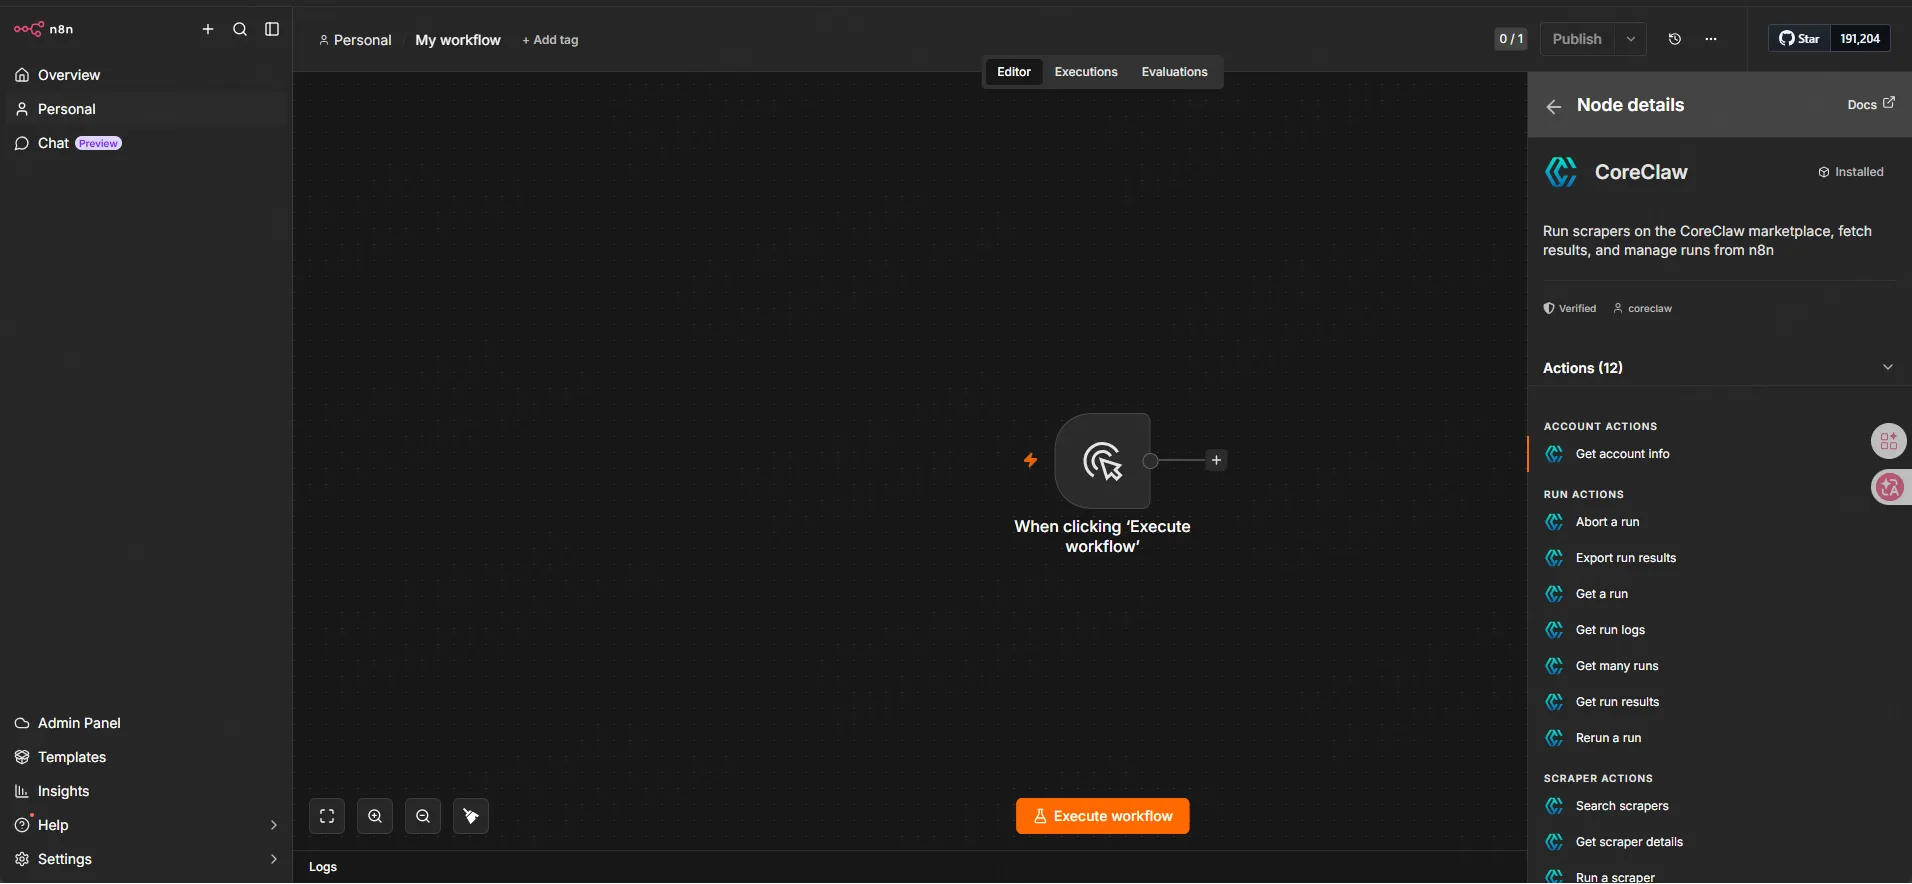
- Click Install node to add the CoreClaw node to your instance.
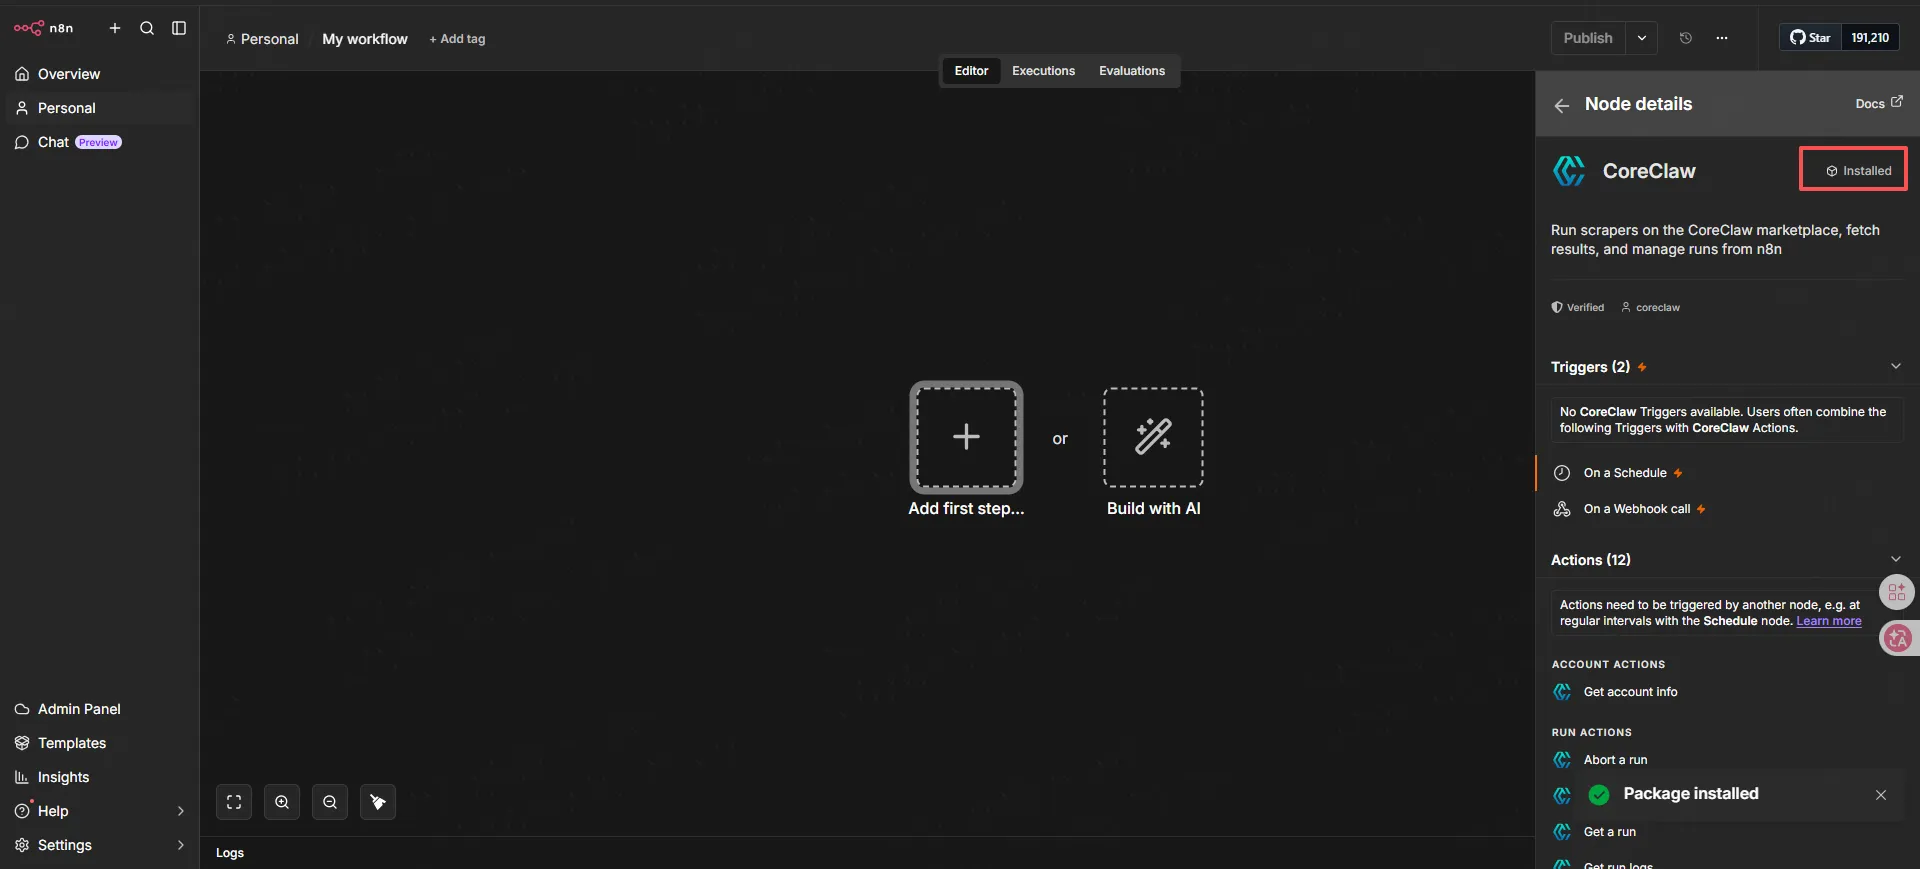
After installation, you can find the CoreClaw node under Community Nodes in the nodes panel.
Create credentials
Section titled “Create credentials”Before using the CoreClaw node, you need to create a credential with your CoreClaw API key.
- In n8n, go to Credentials → Add Credential.
- Search for CoreClaw API and select it.
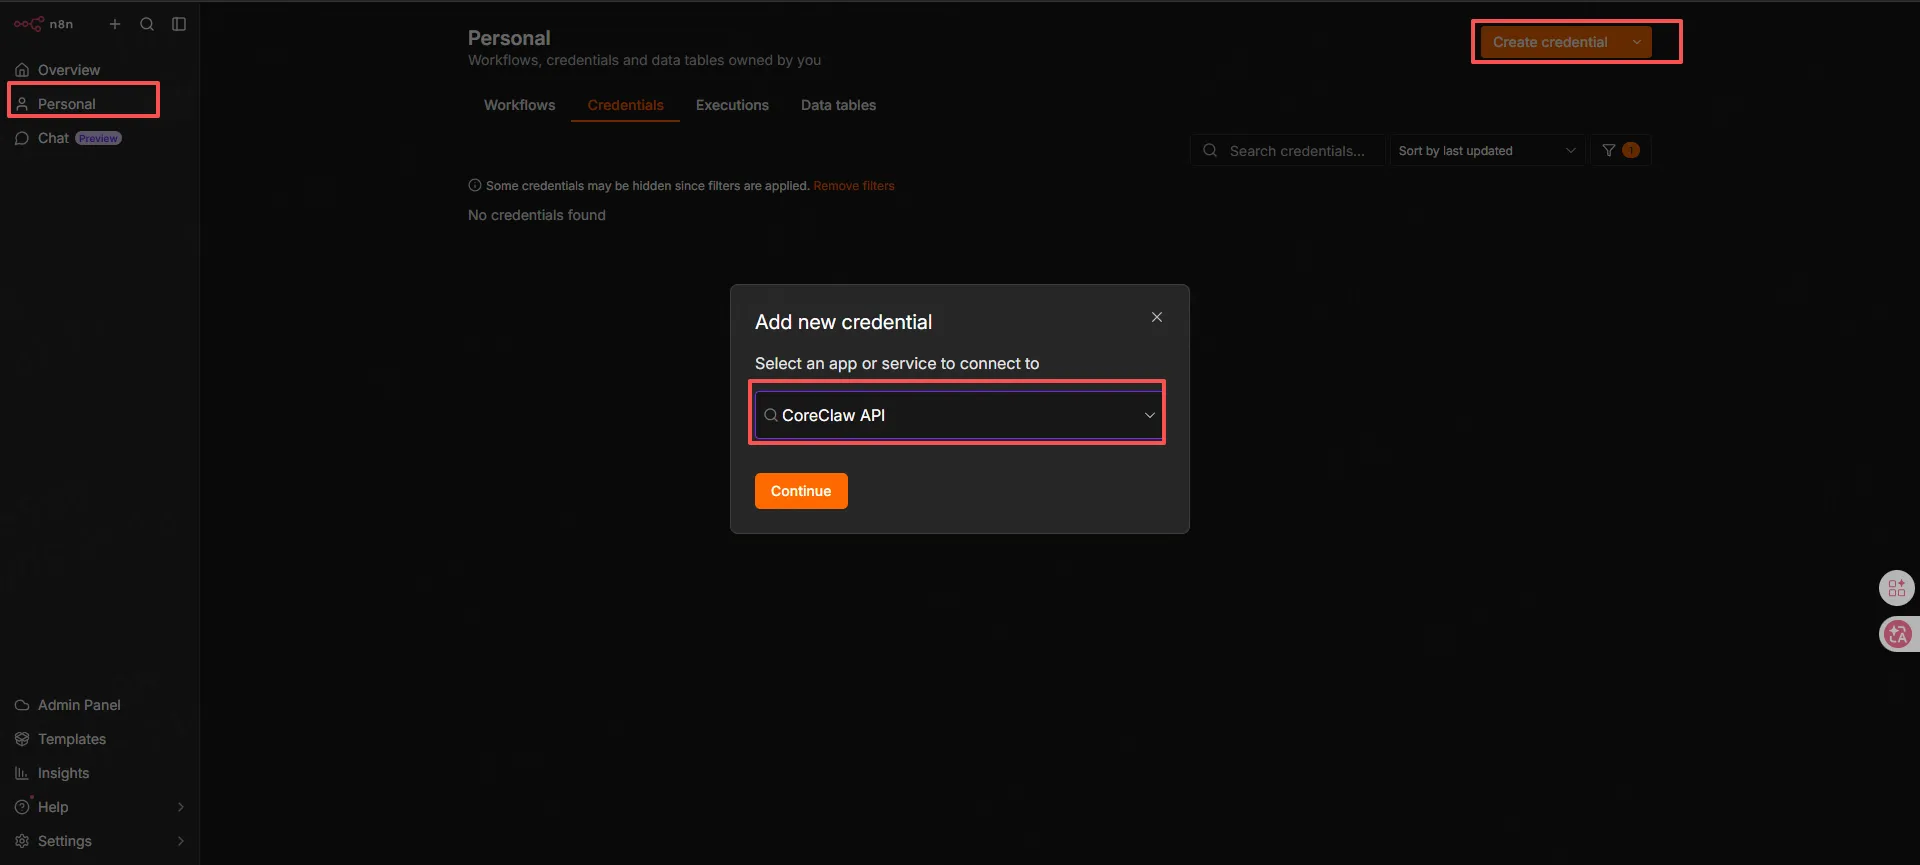
- Enter a name for the credential (e.g., “CoreClaw Production”).
- In the API Key field, paste the API key you copied from the CoreClaw Console.
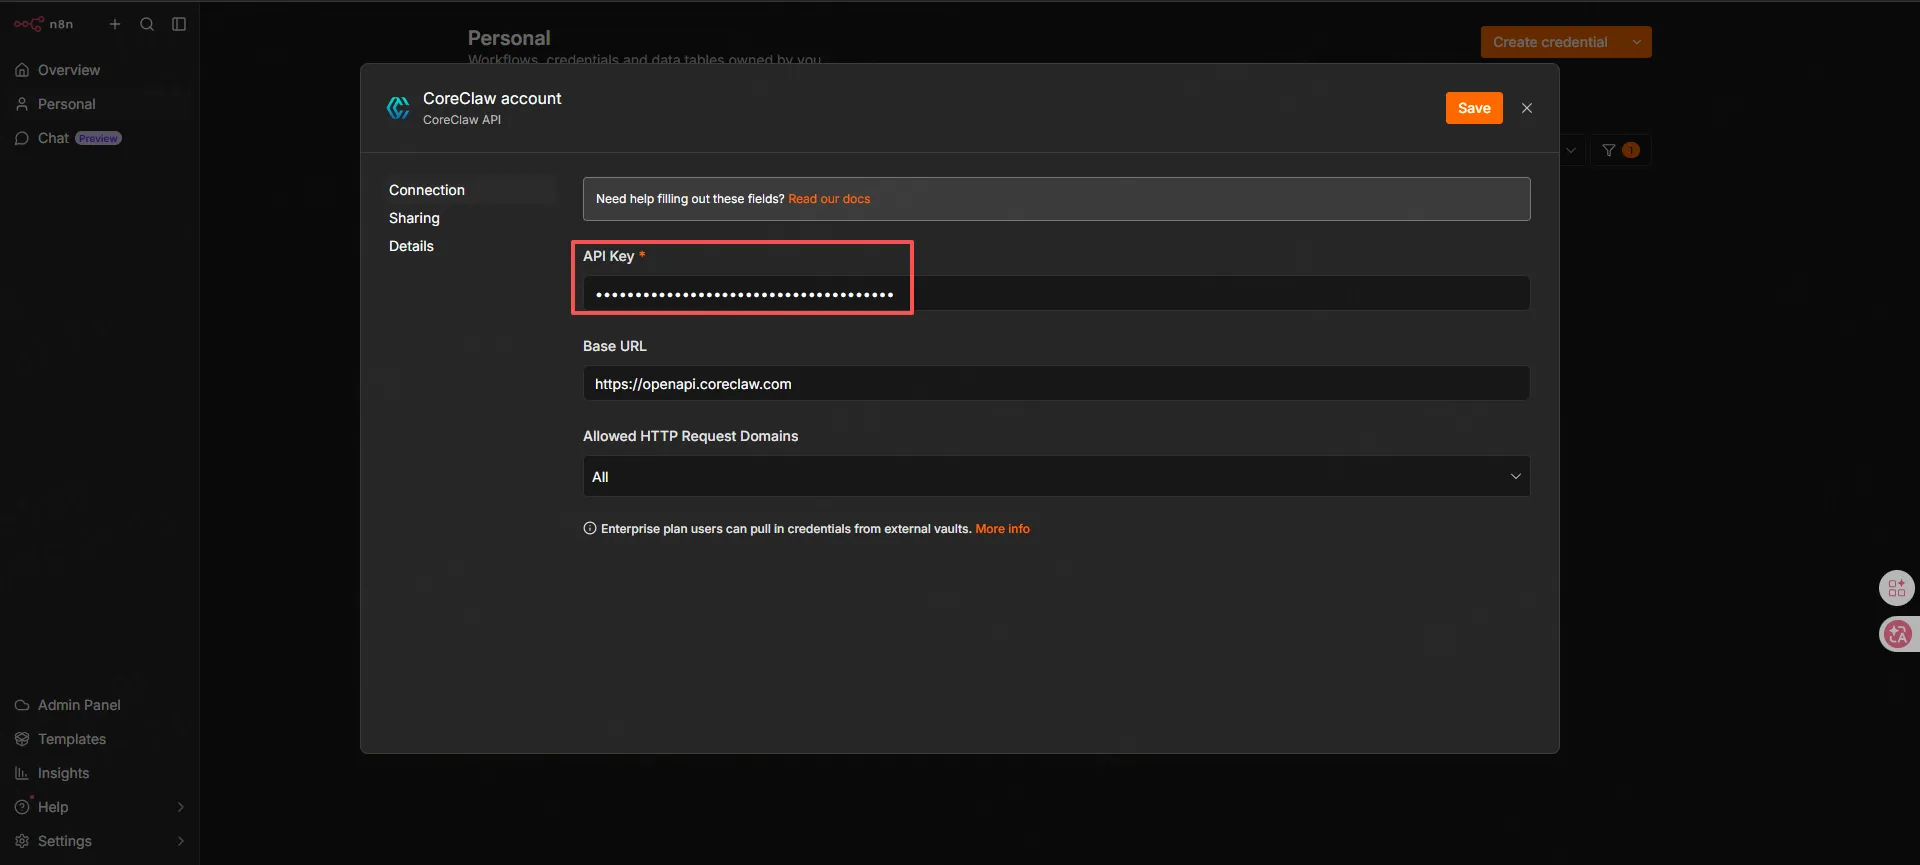
- Click Save to store the credential.
You can now use this credential in any CoreClaw node in your workflows.
n8n self-hosted setup
Section titled “n8n self-hosted setup”If you’re running a self-hosted n8n instance, install the CoreClaw community node from the settings.
Install
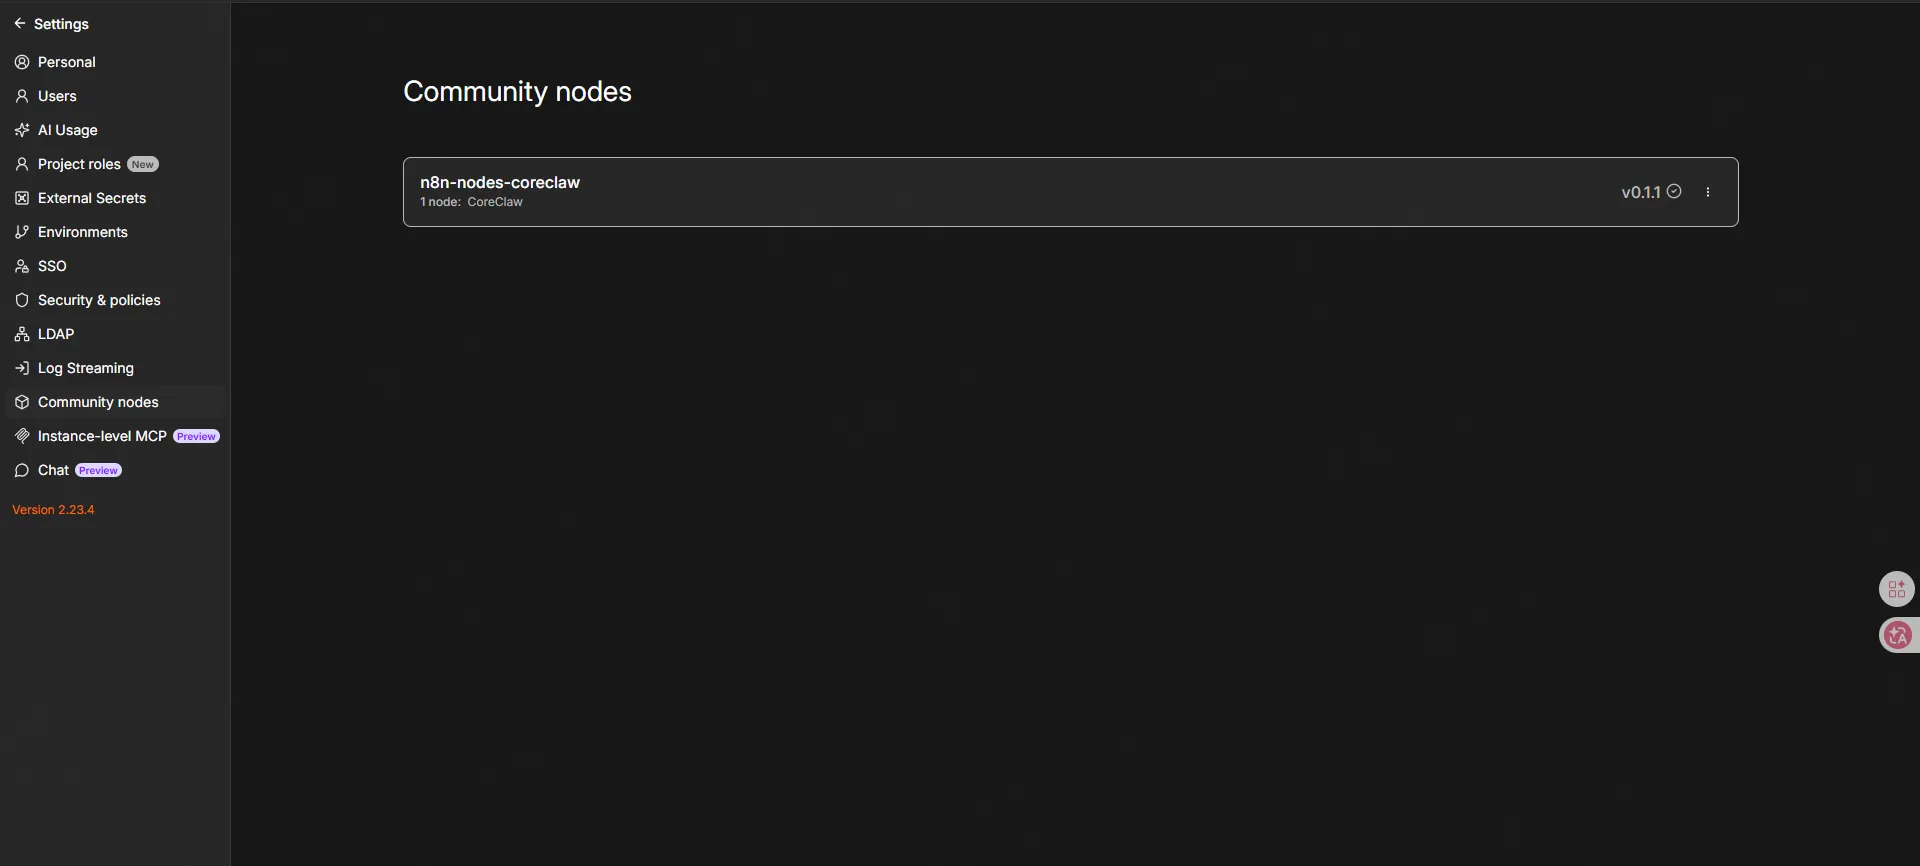
Section titled “Install”- Open your n8n instance.
- Go to Settings → Community Nodes.
- Click Install a community node.
- Enter the npm package name:
n8n-nodes-coreclaw - Agree to the risks of using community nodes and click Install.
- After installation, the CoreClaw node appears in your nodes panel under Community Nodes.
Connect
Section titled “Connect”Follow the same steps as Create credentials above to set up your CoreClaw API key.
CoreClaw node actions
Section titled “CoreClaw node actions”The CoreClaw node is organized by resource. Select a resource, then choose the operation. Operations marked composite start a run, poll to completion (up to ~4 minutes), and return results in a single node.
Common run fields (on Run, Rerun, and task Run operations): Version (optional, defaults to latest), Custom Parameters / Input JSON (the worker’s input, wrapped as input.parameters.custom), Callback URL (optional webhook), Return All (up to 10,000 rows), Limit (per-page cap, max 100).
Store Worker
Section titled “Store Worker”| Operation | Maps to | Notes |
|---|---|---|
| List | GET /api/v2/store | Search public marketplace. keyword, limit 1–100 (default 50), Return All up to 10,000 |
Worker
Section titled “Worker”| Operation | Maps to | Notes |
|---|---|---|
| List | GET /api/v2/workers | Your workers; keyword, Return All |
| Get | GET /api/v2/workers/{workerId} | Pick from Store / My Workers / paste a slug |
| Get Input Schema | GET /api/v2/workers/{workerId}/input-schema | No auth required (public schema) |
| Run | POST /api/v2/workers/{workerId}/runs | Async by default; callback_url optional |
| Run and Get Results (composite) | POST + poll + GET .../result | Starts run, polls ~4 min, returns rows (10,000 cap with Return All, else 100/page) |
| Get Last Run | GET /api/v2/workers/{workerId}/runs/last | |
| Abort Last Run | POST /api/v2/workers/{workerId}/runs/last/abort | No request body |
| Export Last Run Results | GET /api/v2/workers/{workerId}/runs/last/export | format (8 formats, default csv), filter_keys |
| Get Last Run Log | GET /api/v2/workers/{workerId}/runs/last/log | |
| Rerun Last Run | POST /api/v2/workers/{workerId}/runs/last/rerun | |
| List Last Run Results | GET /api/v2/workers/{workerId}/runs/last/result | Return All up to 10,000 |
Worker Run
Section titled “Worker Run”| Operation | Maps to | Notes |
|---|---|---|
| List | GET /api/v2/worker-runs | Filter by worker_id, status; Return All |
| Get Last | GET /api/v2/worker-runs/last | Account-wide latest run |
| Abort Last | POST /api/v2/worker-runs/last/abort | No request body |
| Export Last Results | GET /api/v2/worker-runs/last/export | format, filter_keys |
| Get Last Log | GET /api/v2/worker-runs/last/log | |
| Rerun Last | POST /api/v2/worker-runs/last/rerun | |
| List Last Results | GET /api/v2/worker-runs/last/result | Return All up to 10,000 |
| Get | GET /api/v2/worker-runs/{runId} | Pick from List / paste a run slug |
| Abort | POST /api/v2/worker-runs/{runId}/abort | No request body |
| Get Log | GET /api/v2/worker-runs/{runId}/log | |
| Rerun | POST /api/v2/worker-runs/{runId}/rerun | |
| Rerun and Get Results (composite) | POST + poll + GET .../result | Reruns then polls/returns; same caps as above |
| List Results | GET /api/v2/worker-runs/{runId}/result | Return All up to 10,000 |
| Export Results | GET /api/v2/worker-runs/{runId}/result/export | format, filter_keys |
Worker Task
Section titled “Worker Task”| Operation | Maps to | Notes |
|---|---|---|
| List | GET /api/v2/worker-tasks | Filter by worker_id, keyword; Return All |
| Create | POST /api/v2/worker-tasks | Requires worker_id, title, input_json; optional schedule (schedule_type 1=daily/2=weekly/3=monthly/4=once, with schedule_time/schedule_weekday 1–7/schedule_day/schedule_once_date/schedule_enabled) |
| Get | GET /api/v2/worker-tasks/{workerTaskId} | Pick from List / paste an ID |
| Update | PUT /api/v2/worker-tasks/{workerTaskId} | title, description, schedule fields. To change the input, use Update Input |
| Delete | DELETE /api/v2/worker-tasks/{workerTaskId} | |
| Get Input | GET /api/v2/worker-tasks/{workerTaskId}/input | The task’s stored input payload |
| Update Input | PUT /api/v2/worker-tasks/{workerTaskId}/input | input_json (wrapped as input.parameters.custom), version |
| Run | POST /api/v2/worker-tasks/{workerTaskId}/runs | Async; callback_url optional |
| Run and Get Results (composite) | POST + poll + GET .../result | Starts the task run, polls, returns rows |
| Operation | Maps to | Notes |
|---|---|---|
| List Regions | GET /api/v2/proxy/region | No auth required; language en/zh |
Account
Section titled “Account”| Operation | Maps to | Notes |
|---|---|---|
| Get Info | GET /api/v2/users/account | Balance, traffic, plan expiry. No parameters |
CoreClaw Trigger node
Section titled “CoreClaw Trigger node”A separate CoreClaw Trigger node receives callback_url notifications locally, so you can build webhook-driven workflows without polling. CoreClaw has no public webhook-registration API — instead, you paste the trigger’s webhook URL into the Callback URL field of a run/rerun operation.
The trigger exposes POST <your-n8n-webhook-base>/webhook/callback. Three fields:
| Field | Default | Description |
|---|---|---|
| Event Filter | any | any / succeeded / failed / running / aborting. Non-matching payloads produce no output |
| Validate Payload | on | Require both run_id and run_status in the body, else error |
| Include Headers | off | Copy request headers into _headers on the output item |
The callback body carries run_id, run_status, error_message, execution_start_timestamp, execution_end_timestamp, running_duration, result_count, and result_message.
Example workflow
Section titled “Example workflow”Here’s a typical n8n workflow using CoreClaw:
- Trigger — Schedule Trigger (e.g., every day at 9 AM) or Webhook
- CoreClaw: Worker → Run and Get Results — Start the worker and wait for results in one node (polls up to ~4 minutes)
- Downstream nodes — Send to Google Sheets, Slack, database, etc.
For webhook-driven flows (no polling), replace step 2 with Worker → Run (set a Callback URL) and add a CoreClaw Trigger node to receive the completion event. The manual poll loop — Worker → Run, then Wait, then Worker Run → Get until status is succeeded, then Worker Run → List Results — still works if you need finer control over timing or retries.
Ready-made workflow templates
Section titled “Ready-made workflow templates”Instead of building from scratch, start from the production templates in the coreclaw-n8n-workflows repository. They wire the CoreClaw Google Maps scraper into a business loop — scrape → score → write to Google Sheets → email an Excel-attached summary — and are verified on n8n 2.30.4:
gmaps-leads-to-sheets.json— run, wait for results, then write to Google Sheetsgmaps-leads-sheets-email-summary.json— same, plus export XLSX + Gmail an HTML Top-10 summary with the file attachedgmaps-leads-callback-export.json— callback-webhook driven (no polling; needs a publicly reachable n8n)
Each template needs three credentials: CoreClaw API, Google Sheets OAuth2, and Gmail OAuth2. The repo’s docs/ folder covers credential binding, field mapping, and Google OAuth setup.
Using HTTP Request node (advanced)
Section titled “Using HTTP Request node (advanced)”For operations not covered by the CoreClaw node, use the HTTP Request node to call the CoreClaw REST API directly.
Configuration
Section titled “Configuration”| Field | Value |
|---|---|
| Method | Use the method from the API reference |
| URL | https://openapi.coreclaw.com/api/v2/<endpoint> |
| Authentication | Header Auth |
| Header Name | Authorization |
| Header Value | Bearer YOUR_API_KEY |
| Legacy Auth | api-key header and query token are also supported |
| Body Content Type | JSON |
Common endpoints
Section titled “Common endpoints”| Action | Method | Endpoint |
|---|---|---|
| Get Worker schema | GET | /api/v2/workers/{workerId}/input-schema |
| Start a Worker | POST | /api/v2/workers/{workerId}/runs |
| Run a Task template | POST | /api/v2/worker-tasks/{workerTaskId}/runs |
| Check run status | GET | /api/v2/worker-runs/{runId} |
| Get results (paginated) | GET | /api/v2/worker-runs/{runId}/result |
| Export results (file) | GET | /api/v2/worker-runs/{runId}/result/export |
| Abort a run | POST | /api/v2/worker-runs/{runId}/abort |
Full API reference: API Integration.
- Store the API key as an n8n credential — Never hardcode it in nodes.
- Use expressions — Pass data between nodes with
{{ $json.run_slug }}instead of manual copy-paste. - Handle errors — Check the
codefield in responses. Non-zero means an error occurred. - Rate limits — If you receive a rate-limit error (
code: 13000), add a Wait node before retrying. - Webhook callbacks — Set
callback_urlwhen starting a Worker to receive notifications instead of polling.
Troubleshooting
Section titled “Troubleshooting”Node not appearing after installation
- Refresh the n8n page.
- Check Settings → Community Nodes — the node should be listed there.
- If using n8n Cloud, ensure verified community nodes are enabled in the Cloud Admin Panel.
Invalid API key error
- Verify the API key in the CoreClaw Console.
- Ensure there are no extra spaces or line breaks in the credential.
- Test the key with a curl command:
curl -X GET "https://openapi.coreclaw.com/api/v2/users/account" \ -H "Authorization: Bearer YOUR_API_KEY"A successful response contains code: 0.
Worker-specific input fields
Each Worker has different input parameters. To find the correct fields:
- Open the Worker in the CoreClaw Console.
- Go to the Input tab.
- Click the API button in the top-right corner.
- Select API clients to view ready-to-use code snippets.
Or call the API:
curl "https://openapi.coreclaw.com/api/v2/workers/YOUR_WORKER_ID/input-schema" \ -H "Authorization: Bearer YOUR_API_KEY"The response contains the Worker input schema used to build the input payload.