
Quick Start
Build your first Worker and run it on CoreClaw in minutes.
Prerequisites
Section titled “Prerequisites”- A CoreClaw developer account
- Basic knowledge of Python, Node.js, or Go
- Git installed on your machine
Development Approaches
Section titled “Development Approaches”CoreClaw supports two development approaches for building Workers:
Approach 1: Local Script Development → Worker Adaptation
Section titled “Approach 1: Local Script Development → Worker Adaptation”Develop and validate your core scraping logic as a local script first. Once the logic works correctly, adapt it into a Worker by adding the CoreClaw SDK integration, input_schema.json, and output_schema.json. This approach is ideal if you already have existing scripts and want to migrate them to CoreClaw.
Approach 2: Direct Worker Development
Section titled “Approach 2: Direct Worker Development”Clone a CoreClaw template and develop your Worker directly. Upload it to the platform and test it on CoreClaw’s runtime environment. This approach lets you validate your Worker in the actual platform environment from the start.
Step-by-Step Guide
Section titled “Step-by-Step Guide”1. Clone a Template
Section titled “1. Clone a Template”Choose your preferred language and clone the demo repository:
- Python: Python-Worker-Demo
- Node.js: Node-Worker-Demo
- Go: Go-Worker-Demo
# Pythongit clone https://github.com/Core-Claw/Python-Worker-Demo.git
# Node.jsgit clone https://github.com/Core-Claw/Node-Worker-Demo.git
# Gogit clone https://github.com/Core-Claw/Go-Worker-Demo.git
2. Project Structure
Section titled “2. Project Structure”A minimal Worker project requires:
├── main.py # Main entry file├── requirements.txt # Dependencies├── input_schema.json # Input configuration├── output_schema.json # Output configuration├── sdk.py # CoreClaw SDK├── sdk_pb2.py # Data processing module└── sdk_pb2_grpc.py # Network communication module- input_schema.json — Defines the input form that users see when running your Worker. See Input Schema for details.
- output_schema.json — Defines the output table structure for your Worker’s results. See Output Schema for details.
- sdk.py / sdk_pb2.py / sdk_pb2_grpc.py — CoreClaw SDK modules for communicating with the platform runtime.
3. Write Your Script
Section titled “3. Write Your Script”Edit main.py to implement your scraping logic.
CoreClaw’s runtime is an isolated network sandbox — your script cannot access the internet directly. You must route outbound traffic through the platform’s built-in proxy:
- HTTP request scripts — Proxy configuration is required. Read the proxy address from the
PROXY_AUTHenvironment variable and configure your HTTP client to use the SOCKS5 proxy. See Proxy Support for details. - Browser automation scripts — Connect to the remote browser via the
ChromeWsenvironment variable, to Camoufox viaCamoufoxDomain, or to Lightpanda viaLightpandaDomain(CDP/WebSocket). Proxy is handled automatically by the browser — no manual proxy configuration needed. See Browser Fingerprinting for details.
#!/usr/bin/env python3# -*- coding: utf-8 -*-import asyncioimport osfrom sdk import CoreSDK
async def run():    try:        # 1. Get input parameters        input_json_dict = CoreSDK.Parameter.get_input_json_dict()        CoreSDK.Log.debug(f"Input parameters: {input_json_dict}")
        # 2. Proxy configuration (read from environment variables)        proxy_auth = os.environ.get("PROXY_AUTH")        CoreSDK.Log.info(f"Proxy auth: {proxy_auth}")
        # 3. Business logic        url = input_json_dict.get('url')        CoreSDK.Log.info(f"Processing URL: {url}")
        result = {            "url": url,            "status": "success",        }
        # 4. Set table headers        headers = [            {"label": "URL", "key": "url", "format": "text"},            {"label": "Status", "key": "status", "format": "text"},        ]        CoreSDK.Result.set_table_header(headers)
        # 5. Push result data        CoreSDK.Result.push_data(result)
        CoreSDK.Log.info("Script execution completed")
    except Exception as e:        CoreSDK.Log.error(f"Execution error: {e}")        raise
if __name__ == "__main__":    asyncio.run(run())
4. Configure Input Schema
Section titled “4. Configure Input Schema”Define the input form in input_schema.json:
{ "description": "My first Worker", "concurrency": { "fields": ["url"] }, "properties": [ { "title": "URL", "name": "url", "type": "array", "editor": "requestList", "default": [ { "url": "https://example.com" } ], "required": true } ]}5. Configure Output Schema
Section titled “5. Configure Output Schema”Define the output table structure in output_schema.json:
[ { "name": "url", "type": "string", "description": "The scraped URL" }, { "name": "status", "type": "string", "description": "Scraping status" }]6. Test Your Script
Section titled “6. Test Your Script”There are two ways to test your script:
- Local testing — Run the script directly on your machine to verify the core logic. No Worker adaptation needed at this stage; just make sure the scraping logic works as expected.
- Platform testing — Complete the Worker adaptation (add SDK integration,
input_schema.json,output_schema.json), package as a ZIP, and upload to CoreClaw to test in the platform’s runtime environment.
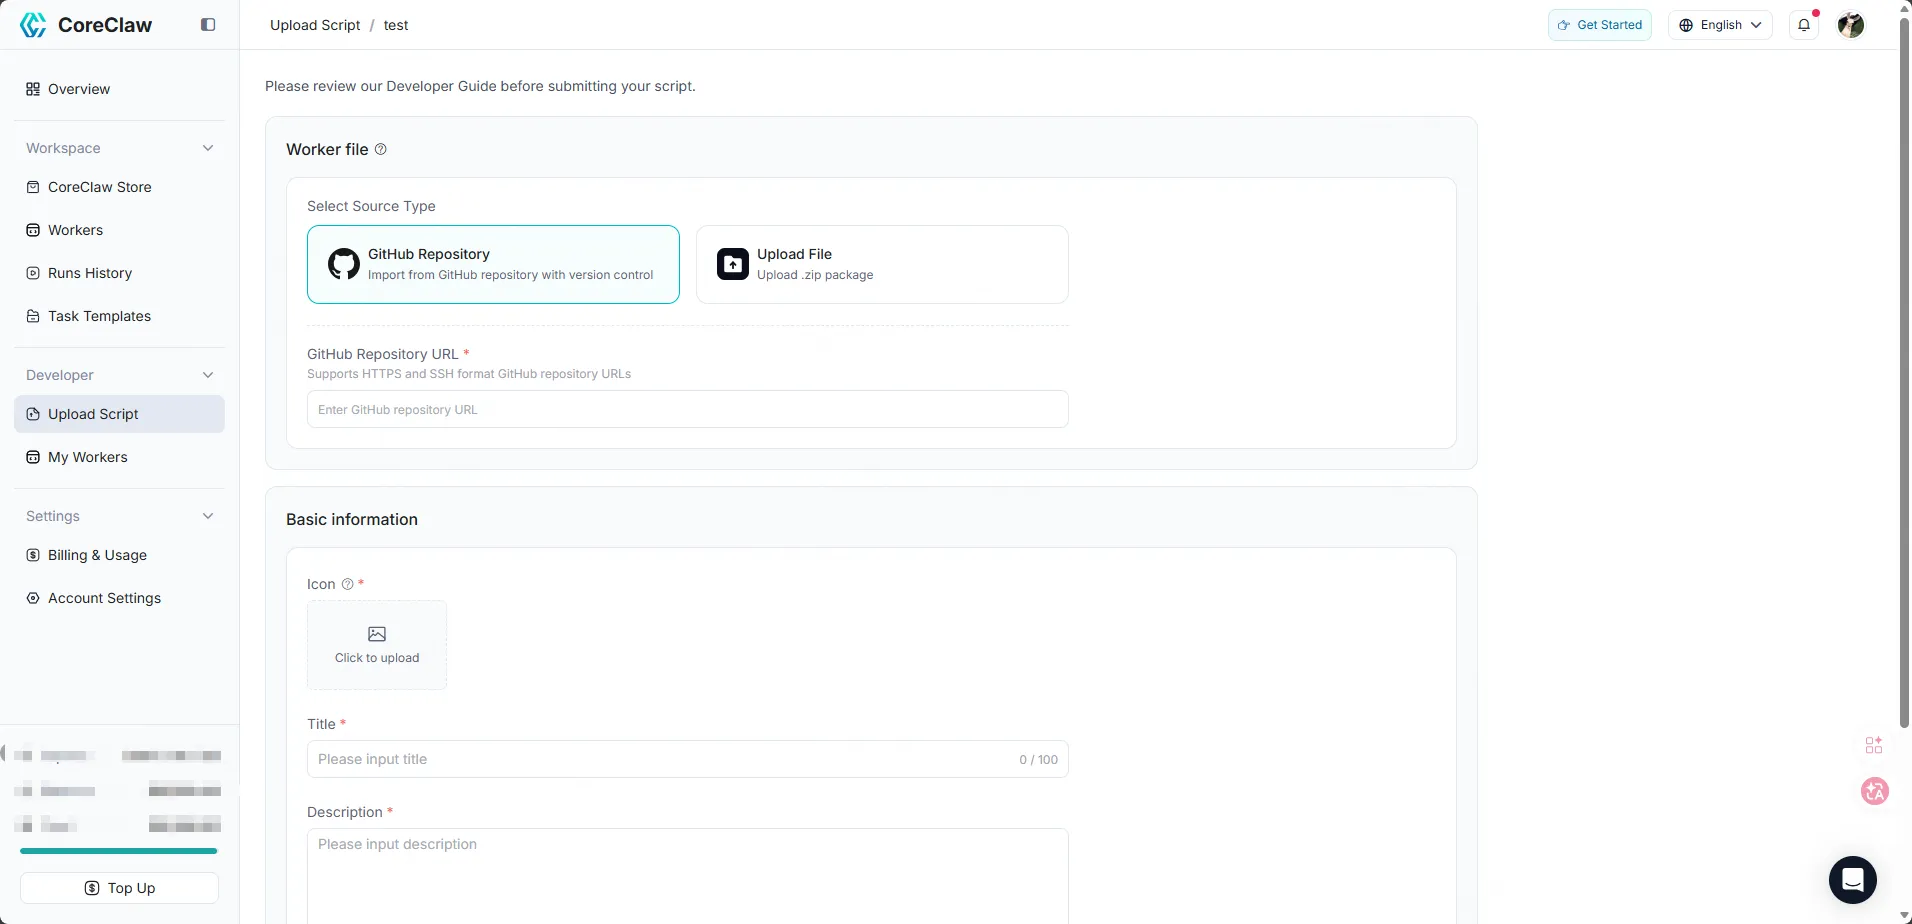
7. Upload to CoreClaw
Section titled “7. Upload to CoreClaw”Once your script is working, package it as a ZIP file and upload it to CoreClaw:
- Log in to CoreClaw Console
- Click the upload script icon to create a new Worker
- Upload your ZIP code package
- Fill in the title, description, and select a category
After uploading, your Worker will appear in My Workers in the Console. At this point, your Worker is private — it is not visible to other users. You can run and debug it directly from the Console.
8. Publish to Worker Store
Section titled “8. Publish to Worker Store”When your Worker is ready for public use:
- Go to My Workers and click on your Worker
- Click Settings & Publication
- Click Publish to submit for platform review
- Once the review is approved, your Worker will be publicly listed in the CoreClaw Worker Store